I’m a visual person. I like words and all, I mean of course. But instead of reading steps, I’d rather have a quick visual reference to look at. SO, voila, a How to for Annie Sloan Chalkpaint infographic. From me, to you!
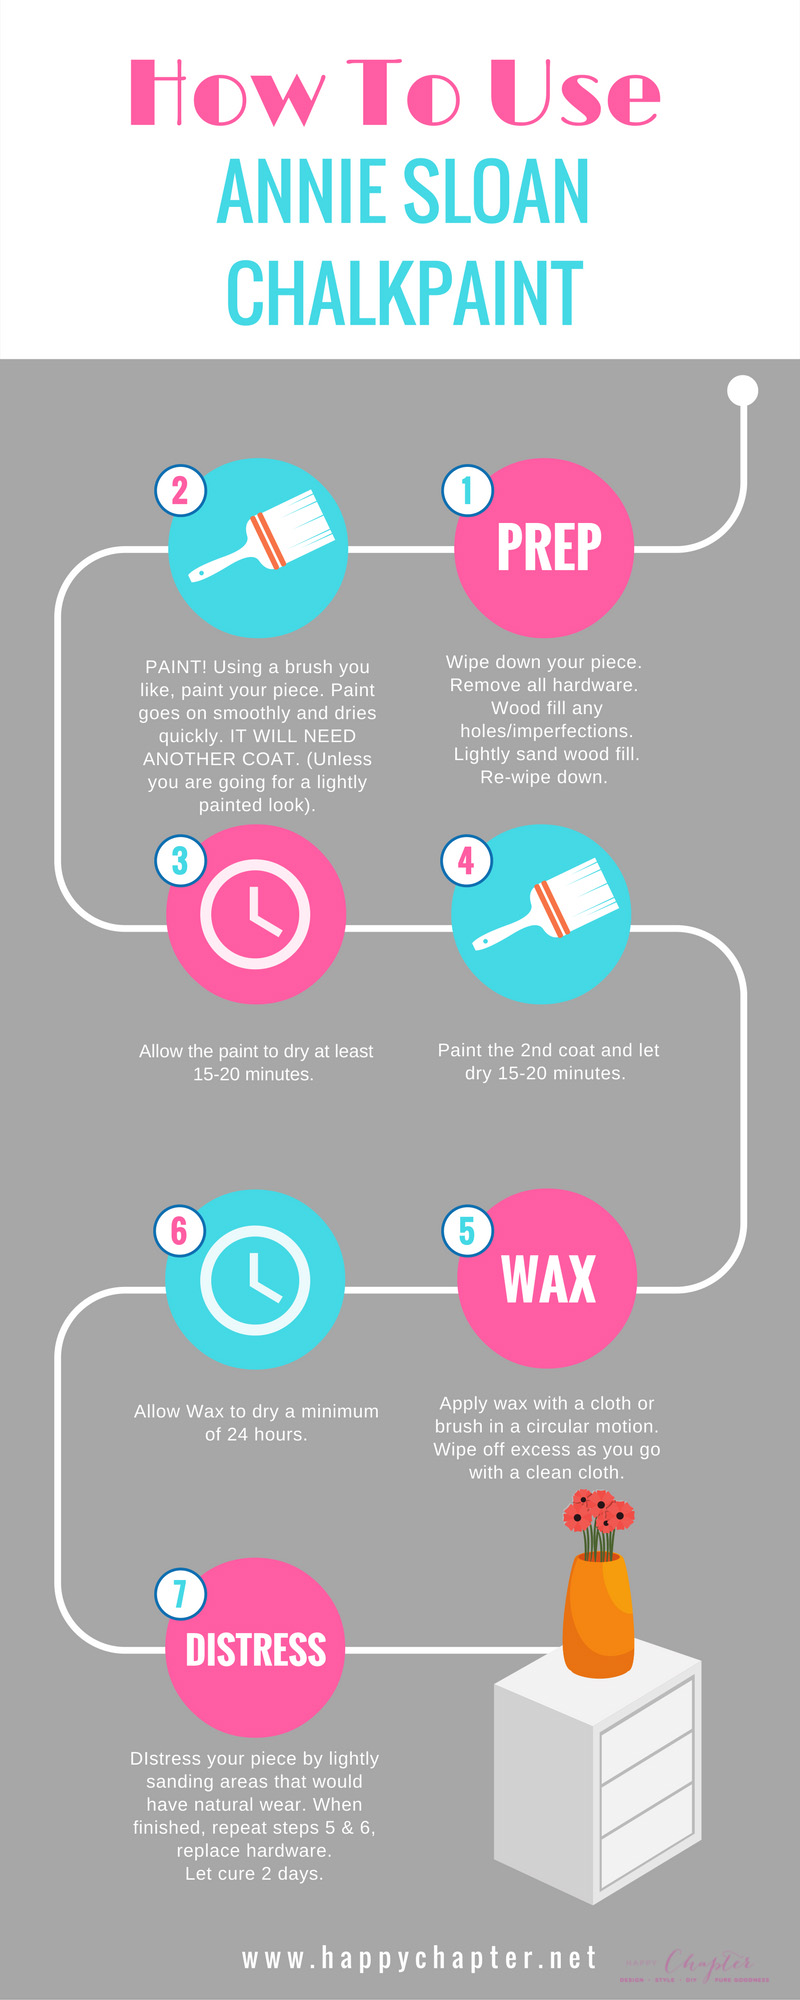

I’m a visual person. I like words and all, I mean of course. But instead of reading steps, I’d rather have a quick visual reference to look at. SO, voila, a How to for Annie Sloan Chalkpaint infographic. From me, to you!
DIY, Crafting and Upcycling can definitely be trial and error, which a lot of the time turns to spent dollars washing down the drain. I try super hard to research what I can to make sure I use the right tools and processes before I jump into a project. With that said, who has the time to spend hours combing the internet to figure it all out?!
Most recently, I needed to figure out an easy-ish way to paint our new deck we just built (Well my husband really built it, I “managed” that project if you know what I mean) and added some outdoor furnishing like backyard fire pits.
Whether you’re planning a kitchen remodeling project or minor home upgrades, it’s essential to do some research in order to get the outcome you have in your vision. To save you guys some time let me share some of my favorite resources to look before I get going on any given project! Let my resources help you before you dive into the next fun DIY!
Inspiration:
Inspiration for any project you can even imagine in your wildest dreams. Pinterest.
A website that I could scour for hours for inspiration and I totally have. Style By Emily Henderson, so obsessed with her work.
Building Plans:
Ana White has countless DIY plans, and they can be found here. Ana White Plans. All the info you need to create something awesome.
Another good one to get step by step instructions. Jen Wood House.
This website is excellent, for plans, inspiration and a TON of info on great tools. This is another I could view for days. Shanty2Chic.
Tools and Supplies (including paint)
The best resource for reviews for me has been Amazon. Unfortunately, you’ve got to read a lot of reviews to get a good gauge on what is what, but hey, a lot of people actually write honest reviews, so that’s a win.
Recently, I wasn’t getting the info on paint guns that I wanted on my Home Depot and Lowes pages, so I found a page that gives information on all sorts of spray paint guns, tons of info can be found on this page, and that was super helpful for me.
Last but not least, if I had a nickel for every DIY Network episode I watched, well, I’d be a bagillionaire. DIY Network website has all kinds of info on whatever problem, question and wonder you’ve got. I HIGHLY recommend that page.
SO…hopefully that helps you, I’m sure I’ve missed some good ones too! So while you share your newest DIY project below, tell me about your favorite resources too and stay tuned for the painted deck, AHHHHH I’m so excited about it!
When we moved into our new house, all of the cabinets were in their natural form, no stain or paint. Definitely not anything wrong with that, just not my bag, if you know what I mean. I had to do something to make them mine. Saw these ideas on https://kingstoncabinetry.co.uk/ and definitely needed to try it out for my house.
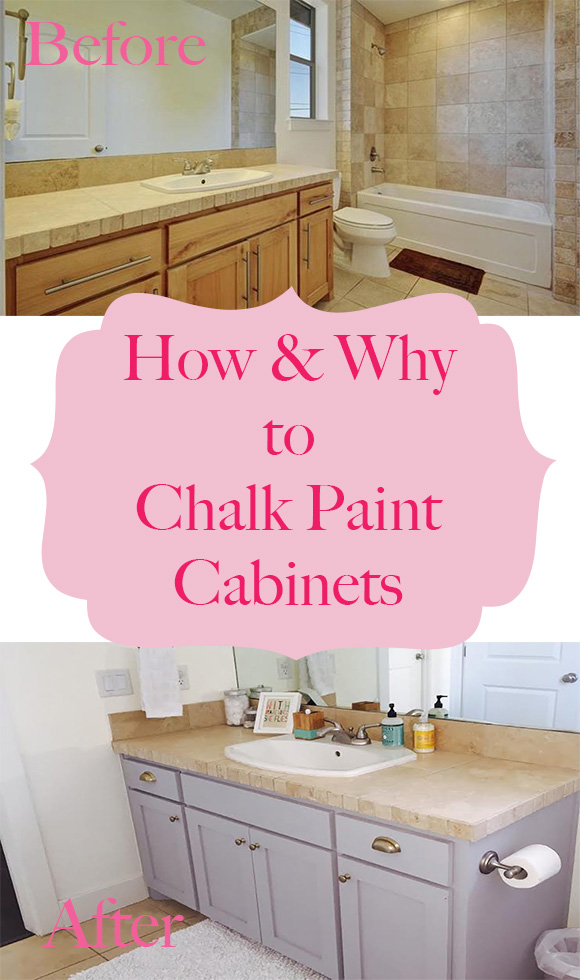
We have these awesome shaker cabinets, so I knew they didn’t need to be replaced, it would just take some DIY painting, and I can handle that! Mark and I spent many moons, like literally 14, painting our kitchen cabinets, sanding, priming, sanding, painting, sanding, painting…you get it. I loved the way they turned out. But that’s not the process I had in mind for our bathrooms. Also think about installing a shower door with 90 degree return panel to get your bathroom more organized and add a fresh look.
We have a little beansprout and I just don’t have a lot of extra time on my hands, so I needed a better solution. I’ve painted a TON of furniture with Chalk Paint, but never cabinets, so I wasn’t sure, and I also wanted to add some paintings and murals from the best Murale Design online to create a good vibe in the room. But I tried it, and SUCCESS!! I have created a fancy little infographic for the process, but I want to share a little more info since these are cabinets and not your regular ol’ furniture project. Here’s how it all went down.

1. Annie Sloan Chalk Paint in Paris Grey 2. Wood Filler 3. Wooster Paint Brush 4. Polycrylic 5. Ikea Knobs and Pulls
Step by Step:
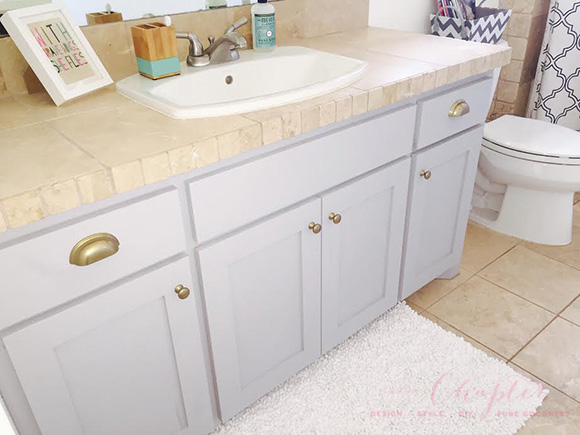
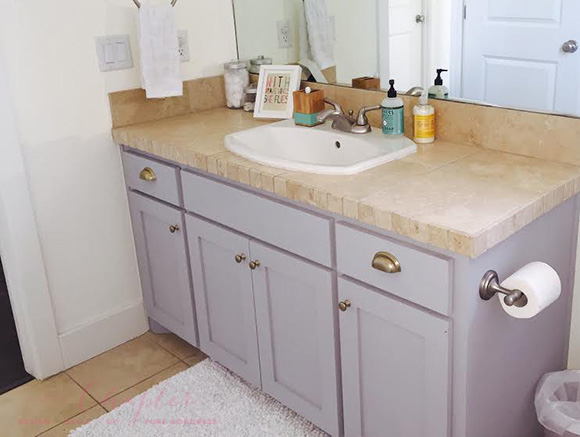
The entire process took like 2 days and that was mostly because I had to let the paint cure. So, why would you want to chalk paint your cabinets? Because it is a quick and cost effective way to make a change. A big awesome change that I made in my bathroom and my kitchen, which was an amazing change as I love cooking all the time with recipes from sites like Kitchenbar.net. I definitely could live without that tile countertop in the bathroom, but the painted cabinets make it way more bearable and I love the bathroom now (especially with the new art I made for the wall)! Some day a new countertop will happen… Anyway, what do you think? Would you try it?
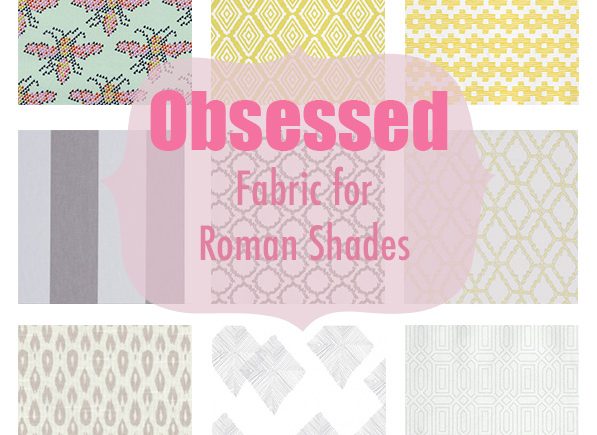
We have a TON of beautiful windows in our open floor plan and I love love the light and the big open-ness of windows without any dressing, but I think I want to do some Roman, well Faux-Roman shades. I’ve been looking at fabric and holy cow! there are SOOOO many wonderful choices out there. I’m having the hardest time narrowing it down. This week I am obsessed with drapery fabric!
So, um, seriously, I think I accomplished something by narrowing it down to 15! I think they would all look really great, even though some of the styles are really really different. A designer at High Cotton Home & Design, gave me a little confidence and told me not to worry too much about styles, just go for what you like. I like that advice, now to just decide which I like the most! I can consult an expert on residential interior design if I need professional advice. Can you guys help on the other things? Which would you go with?
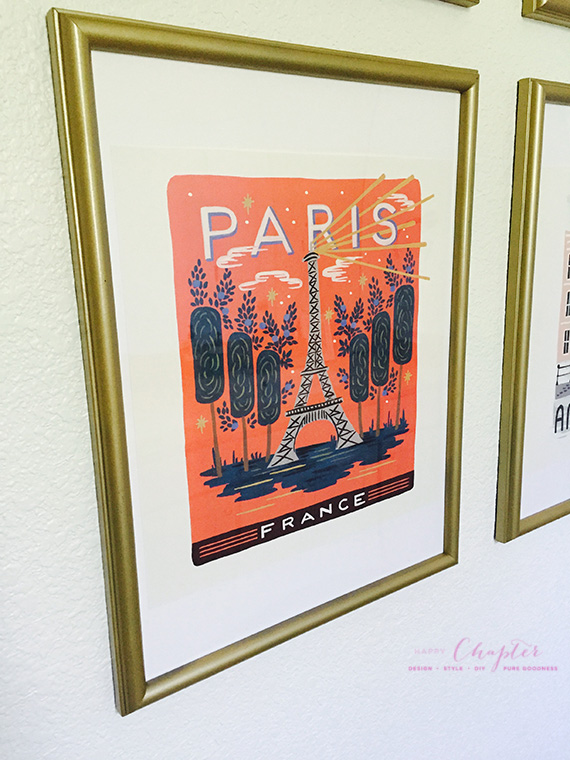
Harper shares her bathroom with guests when they come. She is only 1, so luckily that works pretty seamlessly at this point. I had the hardest time figuring what type of art I wanted for her bathroom since I didn’t want the room to be too childish, but not too grown up either, and then! I came across this blog from The Creativity Exchange. This was just the look I needed, something that can grow with Harper, is colorful and can be guest friendly as well.
I essentially followed her instructions, but I didn’t get custom mats. I just went ahead and laid the cut out art on top of the mat and I love the way it turned out, also getting other decoration and mirrors from these modern bathroom mirrors reviews online.
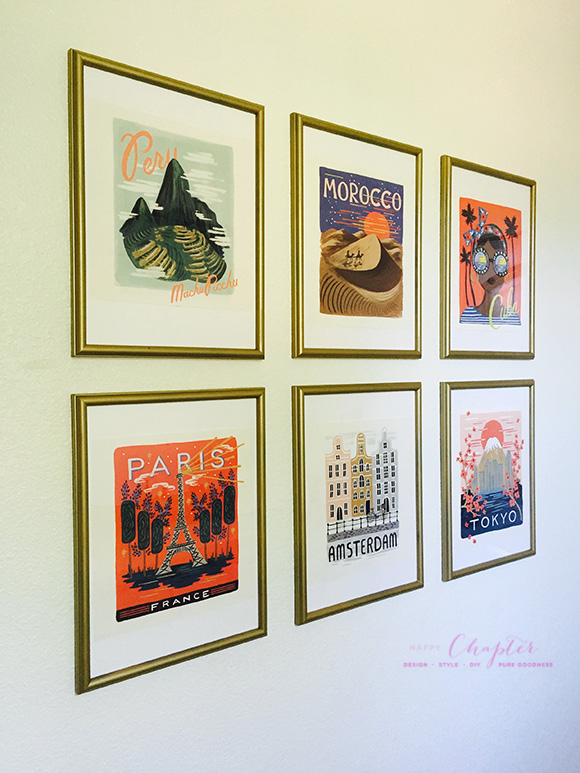
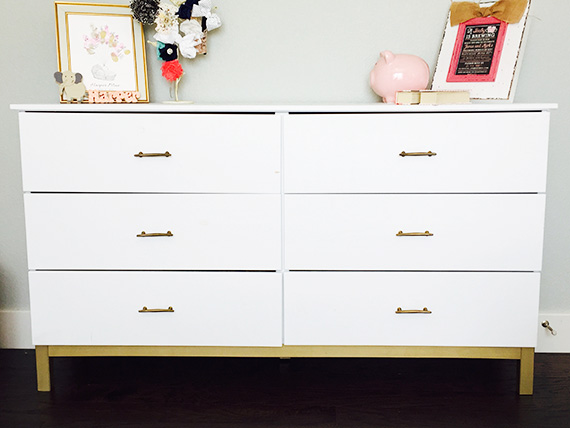
Our walls are white, I haven’t decided if I am going to keep them that way, but I like the way the gold pops. OK – So here is what I did!
I bought the following supplies:
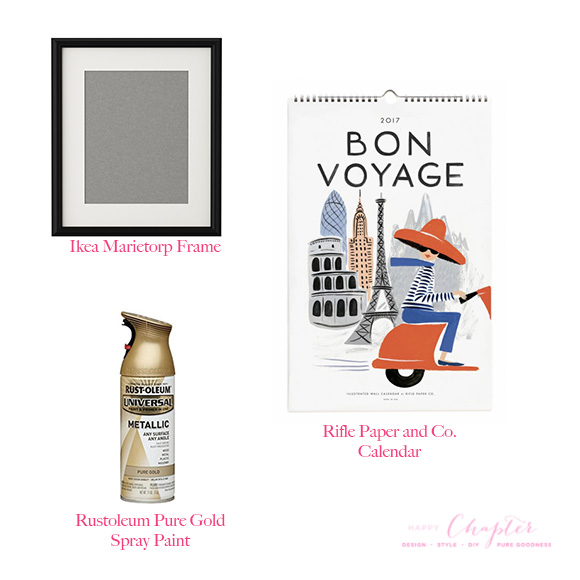
Now the easy part. I sprayed each of my Ikea Frames and let them dry. While they were drying, I picked out the 6 images I wanted to use from the calendar and laid them out how I wanted them. I cut them out with a good ol’ pair of scissors. I only had to take some paper off the top and the bottom, the sides were just the length I needed. I measured to make sure each image was about the same size so it looked even. I decided to not get custom mats made because that wasn’t really in my budget. I decided that I would just lay the images on top of the matting so they still had a nice border. I was happy with that look, it wasn’t perfect, but it looked nice. You can baaaaaaarely see the difference in the paper and the mat.
When I was done cutting, I did a second coat of spray paint on the frames. I waited a day for them to dry, because I didn’t want to take any chances. My last step was to frame each print and then I had my husband hang them evenly where I wanted because hey! Hanging things evenly is NOT my strong suit.
Voila! Easy, budget friendly DIY art for Harper’s bathroom, that will be cute for guests too. I love it!

Year after year I feel like Halloween costumes just get better and more creative. I’ve never been great at coming up with the best Halloween costumes and I think that makes me sort of dread the whole thing. My husband Mark, on the other hand, is a genius and he has the best ideas. Before we had baby Harper, Luna B was our first “dressing up your baby” experience for Halloween. Here’s a little throwback to Luna’s AWARD WINNING (yup!) Hipster Dog Halloween Costume.

This costume was super easy to put together. Here’s what we did.

Sorry for the blurry iPhone picture. As you can see, Luna wasn’t entirely impressed with the outfit, but we took her to a dog Halloween party at her doggy daycare and she took home 2nd place! I hope this little outfit doesn’t offend anyone, we just had fun with it and thought Luna looked pretty cute. What creative costumes are you using this year or have you seen?
Lately I’ve been on a Nursery Furniture kick. I’m loving the fact that we go above and beyond to make the nursery such a warm, cozy and personal environment for our new arriving family members. You know, sometimes the stuff you get at the store just won’t cut it, so you need to create o restore furniture pieces you already have, for this you can Buy Epoxy Resin in Canada with free shipping! and this will help you restore some good pieces of furniture. This week’s obsession is refinished nursery furniture. These are my favorites!
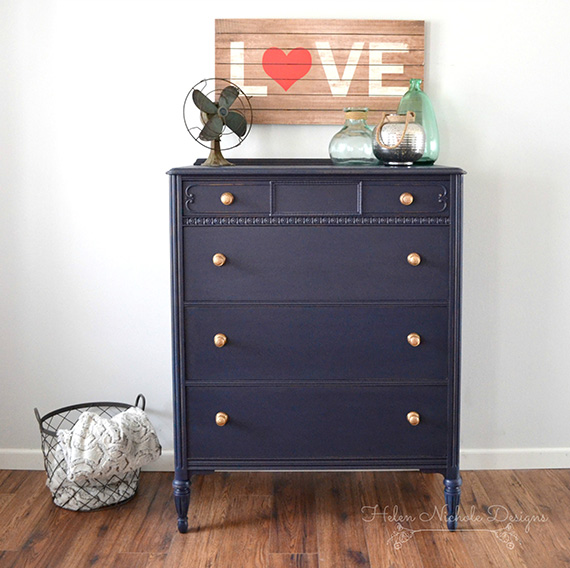
A refinished dresser by Helen Nichole Designs, I’m absolutely in love with this color.
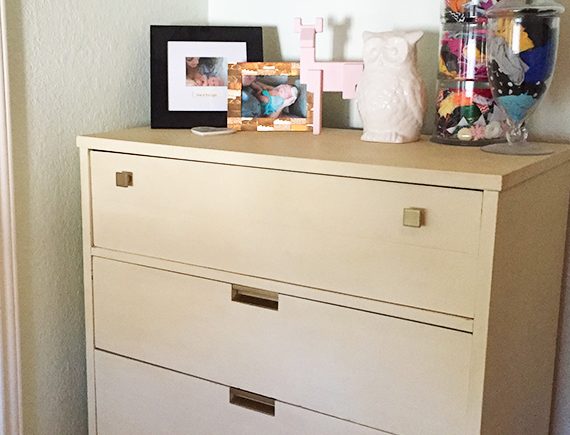
Seriously, how lucky is this little stylish baby that has this gorgeous piece in her room? Unfortunately I couldn’t find the source for this, but it was too cute not to include.
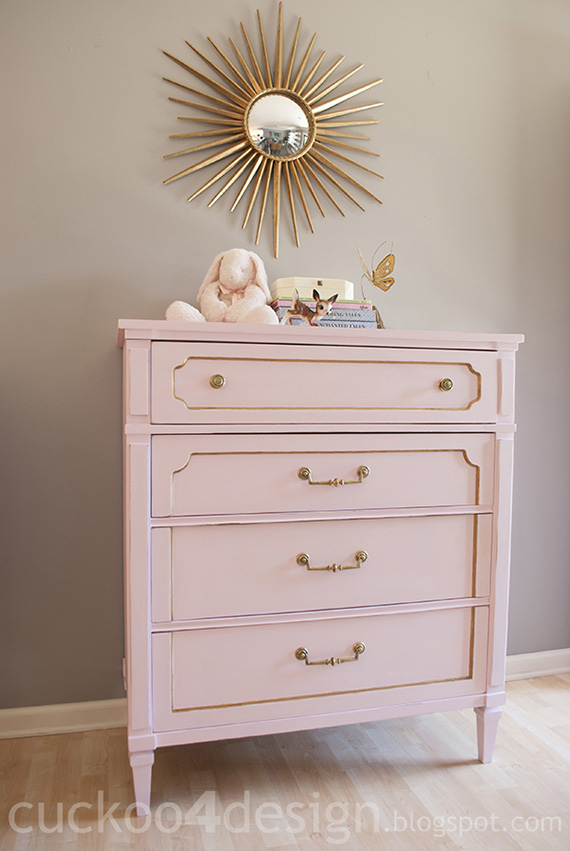
Oooh I’ve been loving this pink blush, and look at this beauty with the classy gold pulls. Redone by Cuckoo4Design. Love.

Bookshelves. Made of drawers. Genius. Addison Meadows Lane details exactly how to get these little gems made too!
I mean if I’m including my favorite, I have to include my last few nursery projects as well, right!? Luci’s MCM Dresser.
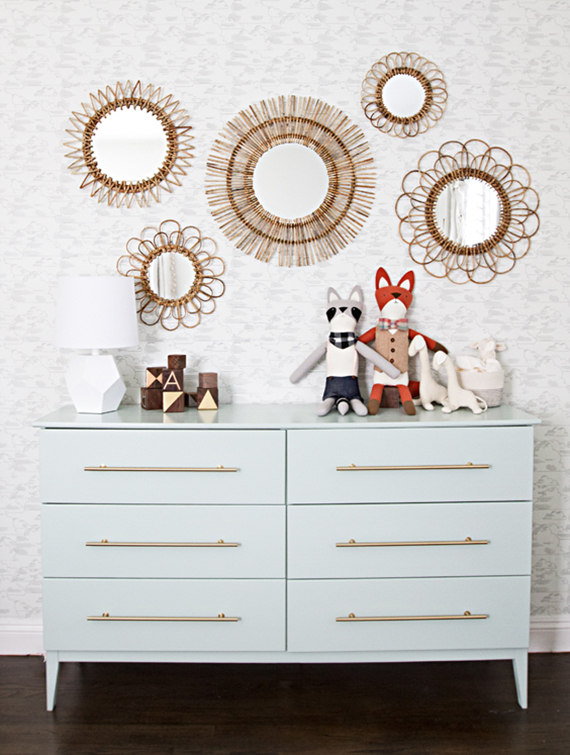
And Harper’s Custom IKEA Dresser that I made for her sassy nursery.
There is just something wonderful about a nursery. Ahhhh, babies! Am I right?
When Mark and I found out we were having a baby girl, we couldn’t have been more excited! As soon as we found out, the nursery ideas began a-flowin’ and I was out of control. I knew I wanted her to have a piece that no one else would have and that’s where I started brainstorming and pinning up a storm. I came across this photo from Sarah Sherman Samuel and was sold.
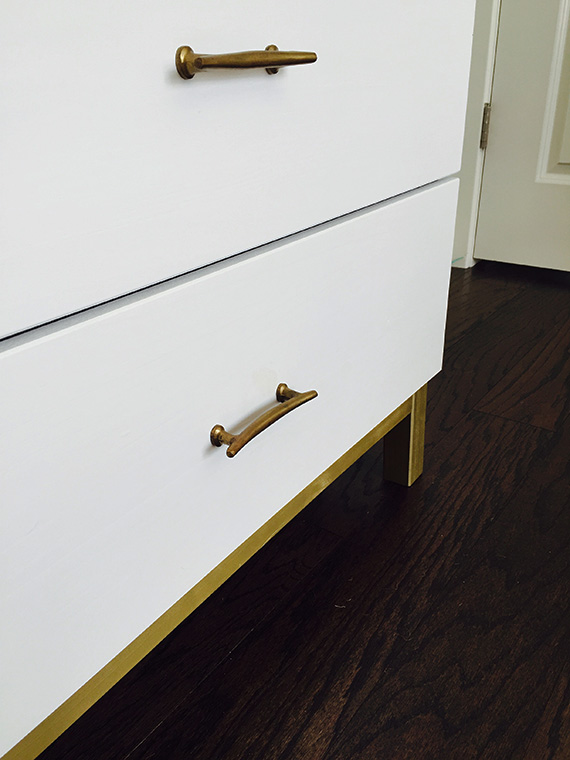
I wanted to do something like this for our sweet baby Harper. Her bedroom colors were roughly, Soft Pink, Mint, Gold, White and Grey. I thought a white dresser with touches of gold could be timeless and something she could use for years to come. So out we went to our nearest IKEA and snatched up the Tarva Dresser. I’ll tell you what, this sucker is not an easy build…well that’s what Mark said at least, but hey, it’s spacious, it’s the size I needed, and it’s going to be stinkin’ cute. So you do what you have to do! We were amazed by the variety TV Bed Store has on furniture styles and more.
We picked out our paint, we picked out our drawer pulls and we were good to go! Having a cluttered and disorganized bedroom closet adds stress and takes time away from your busy days. Whether you need more closet space or just want to find things in your messy bedroom closets, storage cabinet amazon will help transform your space and comfortable bed pillows make the difference. Beautiful design can blend with function when one of our designers helps recommend the right accessories.
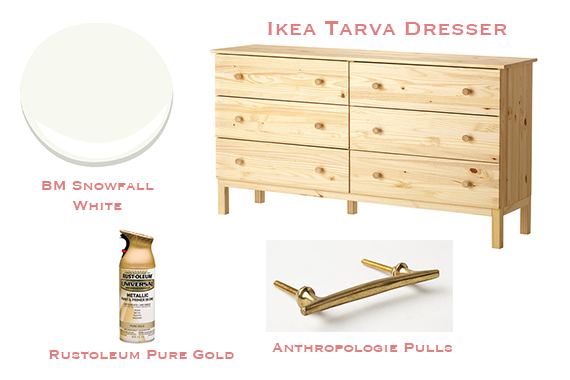
The dresser comes with some thick knobs, but we wanted to add our own touch, so I started by wood filling the holes and we would drill our own holes for the pulls I got later. Finding reliable storage spaces might be a little tricky for you, especially when you are looking forward to store antiques and possessions in a self storage unit. However, there are many self storage facilities that provide you the luxury of choosing a storage unit of your choice, and become free of all worries.
While building the dresser, we did not put the bottom piece on until the end, for two reasons.
Because I wanted this to be super smooth, we (Mark) sanded it with a 180 grit sandpaper to make it smooth enough to prime. I was preggars, so I did the design on this one and Mark did the hard work. After we sanded, we used a fairly heavy primer because sometimes when you are working with wood like this and white paint, the wood coloring can seep through over time. We used Zinsser B.I.N. primer in white. We sprayed 2 coats of primer and 2 coats of paint with our trusty Graco Truecoat Plus II and the finish was SMOOOOOOTH. We did sand in between with a 220 grit paper, which is a pretty important step if you want it to be buttery smoooooth.
Super excited about the way it turned out.
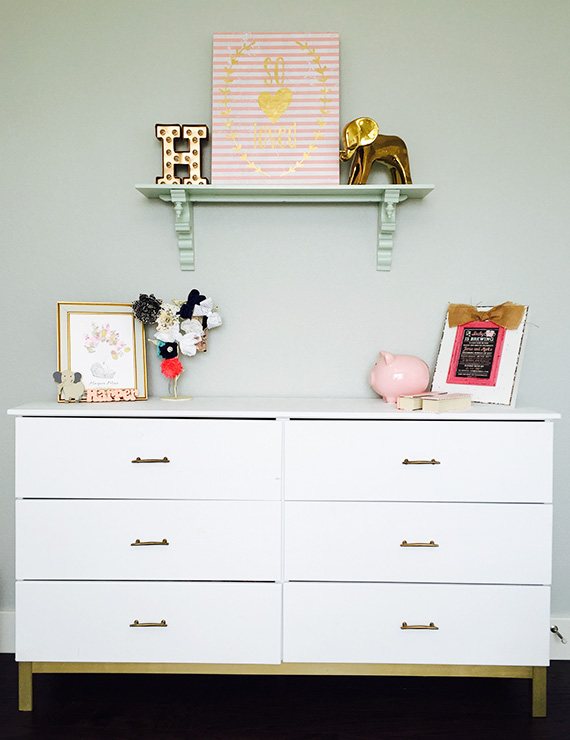
And now our little angel baby cakes has a custom dresser she can use for years!
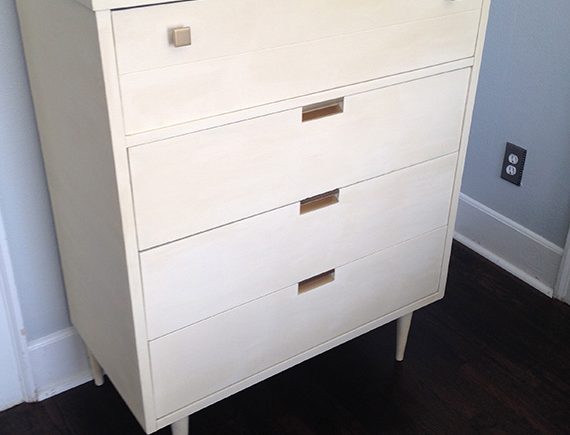
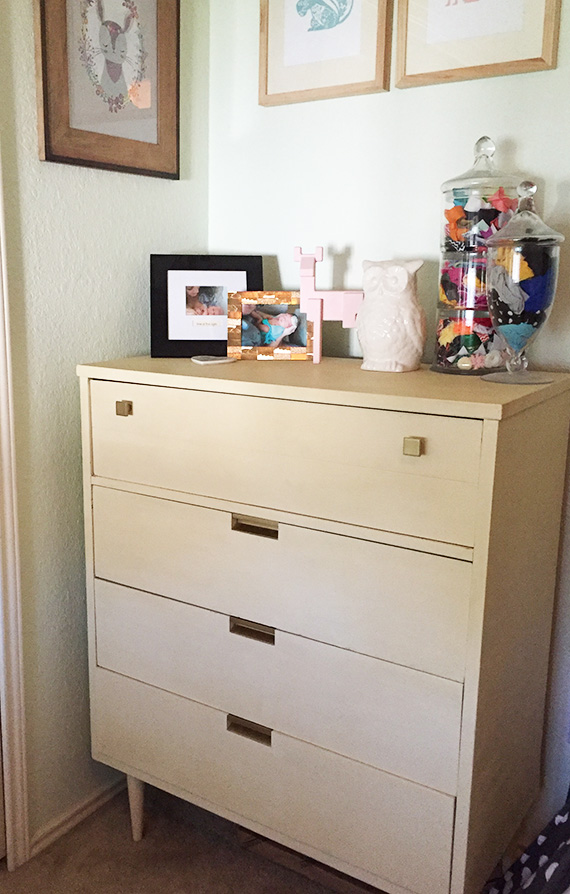
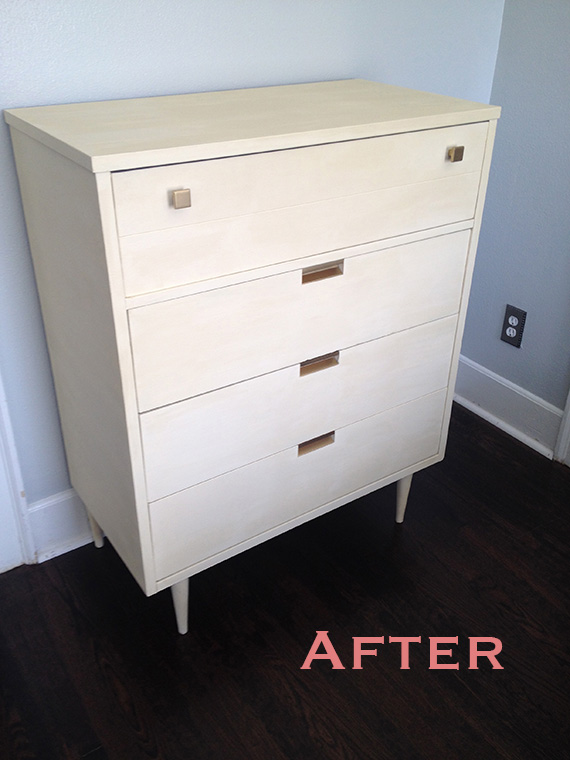
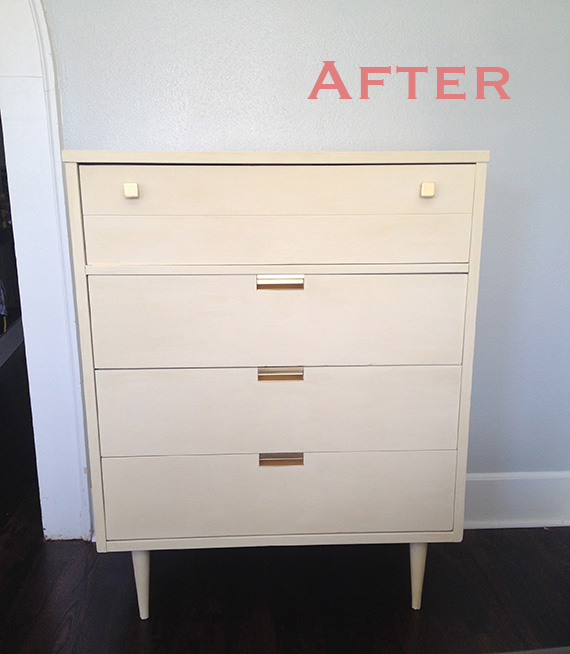
When I saw this dresser at a garage sale, I’d felt like I won the lottery. I guess I’m a sucker for old beat up stuff. Please don’t hate me for painting this beauty, but I saw it and I had a vision.
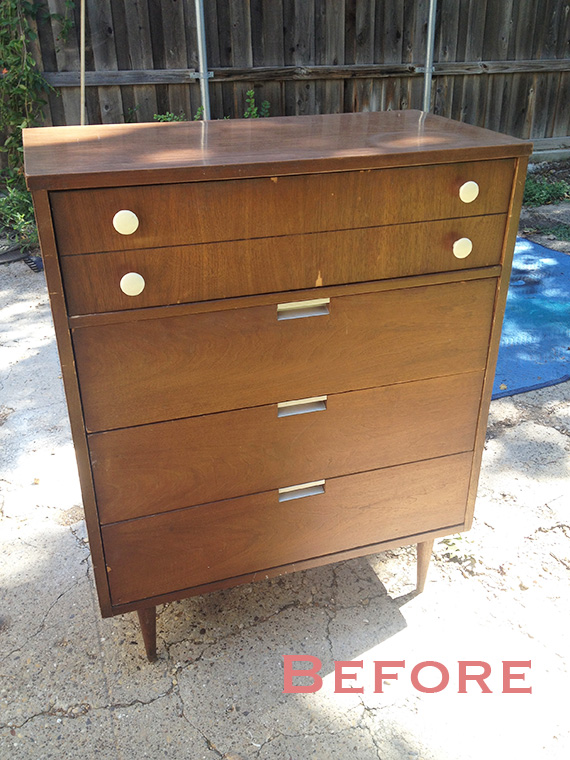
The dresser wasn’t in the greatest shape and needed some love. I needed to refill some areas, and there was plenty of torn veneer, so it would have been quite a mission, not to mention pretty expensive, to restore it to the original look anyway. I love commas. ANYWAY…I was a little uncertain about using chalk paint on something mid century modern, but I was looking for a flat matte look and knew the ol’ Annie Sloan chalk paint would do the trick. Plus HEY! No Sanding, No Priming. I’m in!
After I cleaned and filled holes and any damaged areas with wood filler, I used Annie Sloan chalk paint in Old White using this step by step painting process. Next, I shined up the original drawer pulls, but decided they needed an extra umph! and painted them with Rustoleum Metallic spray paint in Pure Gold to match some super sleek square knobs I found for the top drawer. I’m in love with the final look.
A very close friend of mine purchased this piece for her little girl’s “A Woodland” themed nursery and it looked just perfect in there. Take a look at this interior painting Mckinney company that can help you out with the best quality materials.
So tell me, would you do it? Do you think you could paint an oldie like this?
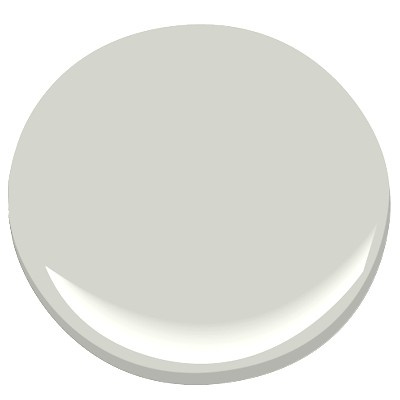
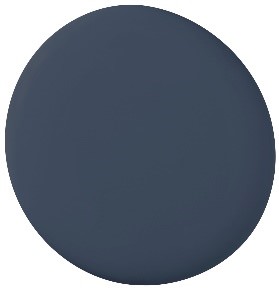
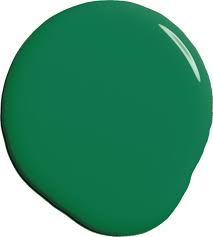
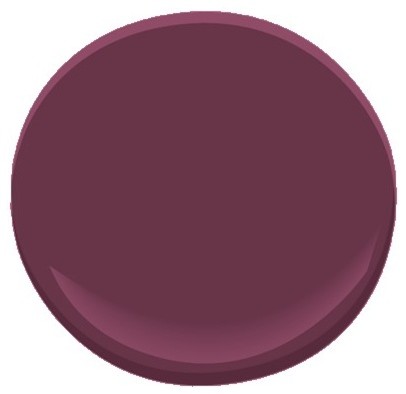
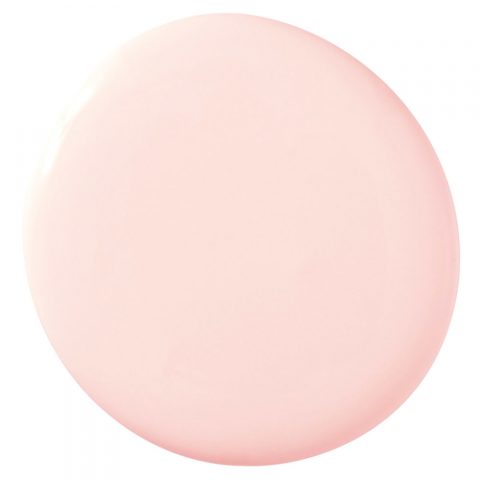
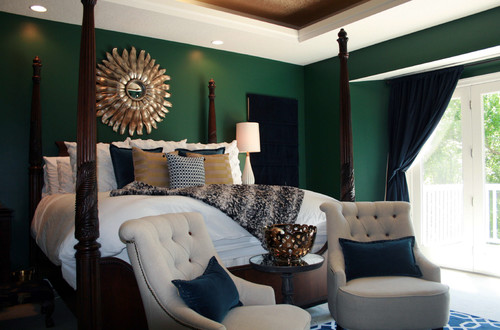
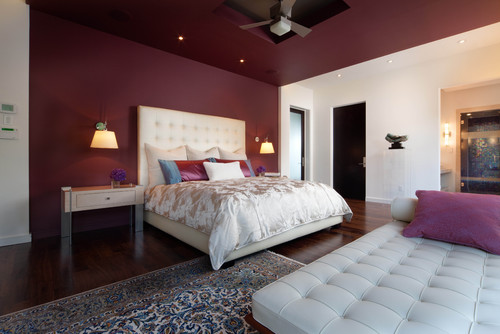
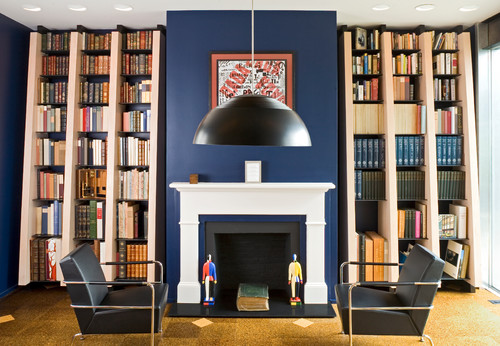
If you are anything like me, you know a good paint color can make all the difference. Whether it’s furniture, a wall or even an accessory in a room, color can create the soothing feel or the fun funky feel you are going for. My color preferences literally do change with the seasons, (well in some cases). Choosing the perfect home pillows can be tough, however. There are so many choices: different fills, different shapes, different sizes. Here are my favorite current paint colors. Now, I just need something to paint!!
And last but not least, I am just dying to paint something with this gorgeous blush color. I saw it in a cute store called Revival here in Austin and I immediately went home to see what I could paint in our house. I’m thinking Harper’s reading nook table? Hmmm. Here it is on a wall.
Ahhhh, paint. Any you know of that I just must see?